D-Link WiFi Range Extender Setup
Admittedly, the D-Link range extenders have evolved as revolutionary in the networking world with their exceptional functions. These devices have the potential to replace traditional routers and wired internet connectivity, by offering an extended network range. Thus, to make the most of these networking devices, you must perform the D-Link WiFi range extender setup.
Therefore, this guide offers you deeper insights into the complete stepwise procedures and effective methods to complete the D-Link WiFi extender setup process. Additionally, you will get the details on the proven troubleshooting methods to fix common issues related to it. Hence, dive in for complete details!
Requirements for the D-Link WiFi Range Extender Setup
When you are about to carry out the D-Link extender set up, you must have various necessary things with you, as mentioned below:

A D-Link range extender

Reliable internet connection

Accurate Admin credentials

Correct web/IP address

D-Link WiFi app

Ethernet Cables
How to Setup D-Link WiFi Range Extender?
Doesn’t matter, if you own a D-Link extender, you must set it up according to your preferences, to make it work for you. However, there are mainly three ways to accomplish the D-Link WiFi repeater setup, which are illustrated below with the stepwise procedure of each:
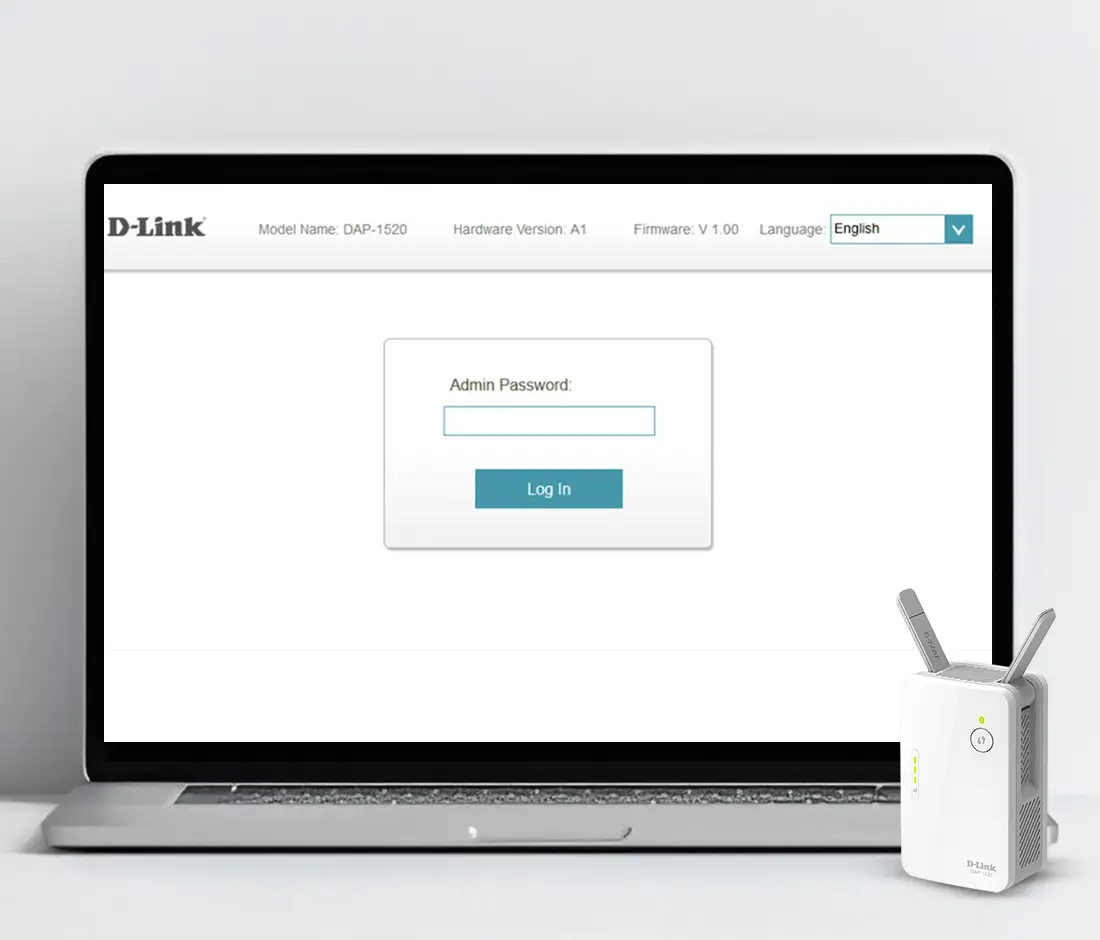
D-Link Extender Setup Via the Web Interface
- Foremost, make sure that your D-Link extender is powered on.
- Then, connect your computer to the extender’s network.
- Now, open any web browser and type the dlinkap.local web address in the browser bar.
- Here, enter the valid admin credentials in the login window appearing on the screen.
- After that, you reach the master setup wizard of the extender.
- Now, tap on the WiFi Setup to edit your SSID and password to secure your network.
- Hereon, enter a complex SSID and password under the Network name (SSID) and WPA-PSK fields.
- Then, navigate to Advanced Settings to configure the Parental Control, AP Mode, Bridge Mode, Guest Network, etc. accordingly.
- At last, click on Save Settings to implement these settings.
- Finally, you are done with the D-Link Extender Configuration process.
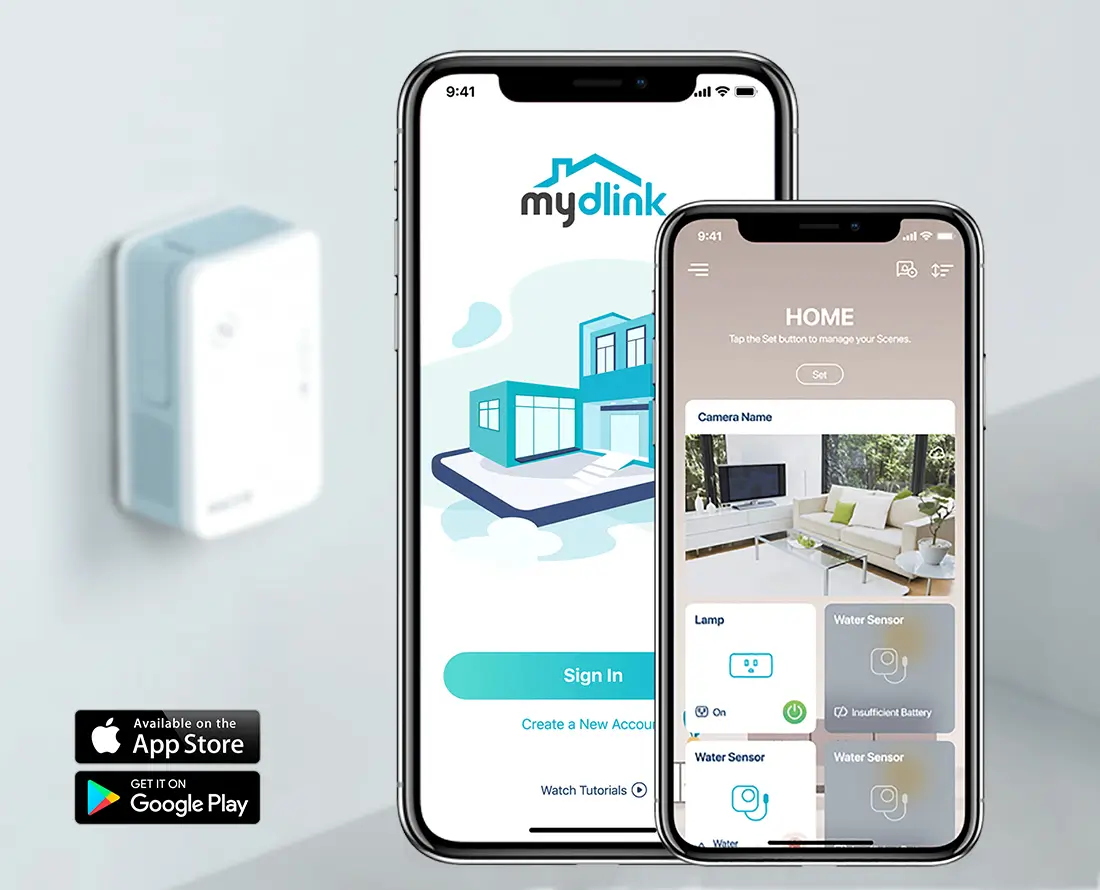
D-Link WiFi Repeater Setup using the App
- Initially, make sure you have downloaded the recent version of the D-Link WiFi app.
- Now, link your smartphone and D-Link extender to the same network.
- Then, open the app and log into your account using the valid credentials.
- If you don’t have an existing account, then create it first and then log in.
- After login, you enter the Home Dashboard of the extender.
- Hereon, go to the WiFi to modify the default SSID and password of your network.
- Next, type a new SSID in the network name (SSID) password and password under the WPS-SPK fields.
- Furthermore, you can also configure and modify the Guest Network, Internet Settings, and Network Settings accordingly.
- Finally, tap on Save to execute these changes.
- Eventually, your D-Link WiFi range extender setup is completed.
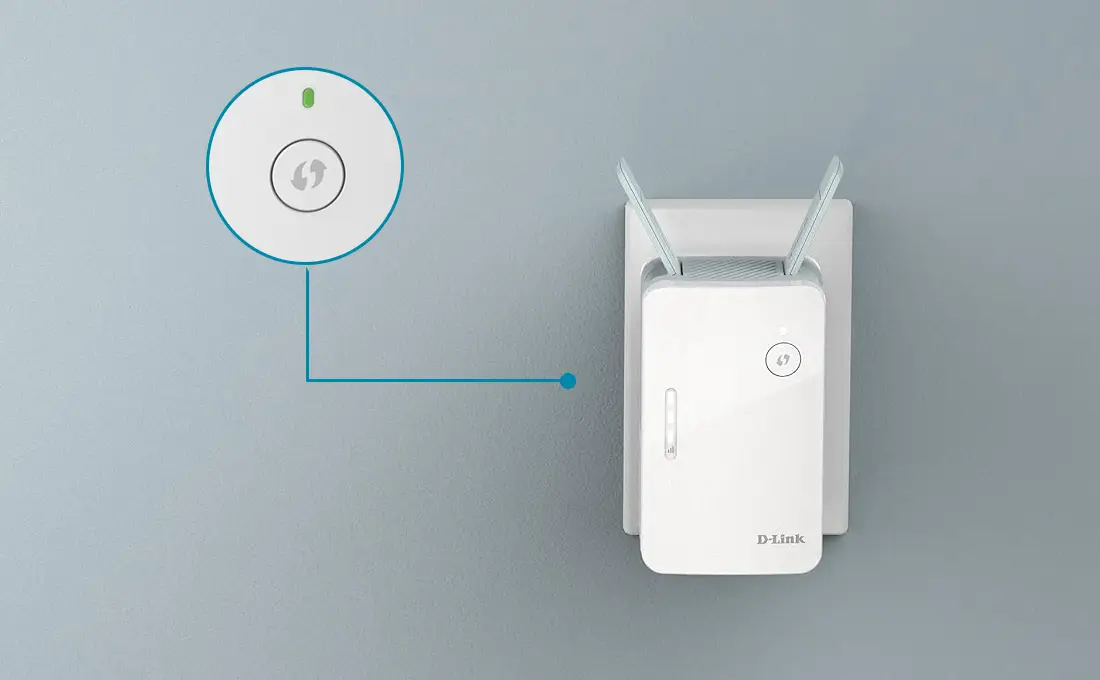
WPS Button Method to Setup D-Link Extender
- Primarily, power on your D-Link extender and ensure a stable internet connection.
- Now, locate the WPS button on your networking device.
- Then, press this button using a small pin.
- After that, hold this button for around 3 seconds.
- Wait till the LED on the extender indicates a green blink.
- Finally, release the button, and your D-Link extender is configured.
- With this, you’re done with the D-Link WiFi extender setup process.
How to Fix D-Link Extender Setup Issues?
It has been seen oftentimes that D-Link users get stuck while setting up their networking devices. However, issues may arise due to internet connectivity issues, browser or app issues, signal interferences, etc. Thus, to resolve these issues, you can use the below-given troubleshooting tips:
- First of all, be sure that you have a stable internet connection.
- Otherwise, you can use the ethernet cables to stabilize your internet connection.
- Make sure all the ethernet cables are tightly connected to your networking device and the power source.
- Cross-verify your login credentials and web address while accessing the admin panel of your extender.
- Fix the browser and app issues by clearing the unwanted cached data. Additionally, use the latest version of the web browser and app during this process.
- Check that you have an adequate power supply and all the devices are working well.
- Eliminate all the physical objects such as mirrors, heavy furniture, microwaves, baby monitors, etc. coming within the signal range.
- Ensure that you have regularly updated the extender’s firmware with the latest version.
- Immediately remove the corrupted firmware file from your device.
- Make sure you have temporarily disabled the security software like VPN, Firewall, ad-blocker, anti-virus, etc. till the process is in progress.
- Carefully configure all the settings and save all the changes when you are done.
- Power cycle your range extender if facing issues due to technical glitches and bugs.
- Reposition your networking devices to the central position and in a shady area to avoid device overheating.
- Contact your ISP authorities immediately, if you are facing network drop-offs frequently.
- If none of these solutions works, factory reset your D-Link extender. For the complete reset process, visit our official website!
Ultimately, you are now being able to perform the D-Link WiFi Range Extender Setup on your own using this detailed guide. If you still want to know more details, reach out to us!
Frequently Asked Questions
Where is the WPS Button on My D-Link Extender?
You can find the WPS button on the top of your D-Link range extender.
Do I Need to Login to D-Link Extender for Configuration?
If you are using the web GUI or app methods, then you need to log into your extender first. But, using the WPS button method, you can directly configure your device.
How to update the D-Link repeater’s firmware via the web interface?
You need to first log into your device using the dlinkap.local web address. Then, go to the Management section appearing on the top of the Home Dashboard. Hereon, select the Upgrade from the drop-down list and follow the on-screen instructions.
Which LED indicates the D-Link extender is working well?
The indication of solid green LED on the D-Link range extender represents you have a good wifi signal and your device is working well.